
Image Classification
Image Classification คือ กระบวนการที่จำแนกรูปภาพออกเป็น Class ได้นั่นเอง เช่น การที่เรายื่นภาพส้มให้คอมพิวเตอร์ และคอมพิวเตอร์นั้นๆ สามารถจำแนกและบอกเรากลับมาได้ว่า เจ้าภาพที่ให้ไปนั้น คือส้มนะ
ซึ่งการทำ Image Classification เราจะใช้กระบวนการที่เรียกว่า “Convolutional Neural Networks” หรือ “CNN”
Convolutional Neural Network (CNN) คืออะไร ?
คือ Neural Network แบบหนึ่งที่มักถูกนำมาใช้ในงาน Computer Vision หรือ วิเคราะห์รูปภาพ เช่น Image Classification (การจำแนกรูปภาพ)ซึ่งรับ Dataset ผ่าน Input Node หรือข้อมูลที่มีลักษณะเป็นลำดับ (Sequence) ซึ่งจะต้องถูกประมวลผลตามลำดับเพื่อจะทำนายได้ถูกต้อง
Requiment
เราจะใช้ Python และ Tensorflow ในการทำ ซึ่งมี 2 ทางเลือก คือ
- Google colab ที่มีทุกอย่างพร้อม และทำผ่าน Web browser ซึ่งเป็น Saas ของ Google นั่นเอง
- Jupyter Notebook ที่ทำใน Client ของเรา
ทั้งหมดจะทำผ่าน Jupyter Notebook ในตัวเครื่อง Local ของเรานะครับ ซึ่งจะมีสิ่งที่จำเป็น 3 อย่างดังนี้
- Cuda
- CuDNN
- Tensorflow, Tensorflow- gpu
บทความนี้ไม่อธิบายการติดตั้ง
เริ่มทำกันเลย
เริ่มด้วยการเตรียม Data set ก่อน จุดประสงค์ของการทำครั้งนี้ คือการจำแนกภาพผลไม้ทั้งหมด 4 ชนิดโดยจำนวนภาพของผลไม้ชนิดละ 30 ภาพ คือ แอปเปิ้ล กล้วย ส้ม สตอเบอร์รี่

เปิด Jupyter Notebook ขึ้นมา

เช็ค GPUก่อนว่าพร้อมใช้งานหรือเปล่า
!nvidia-smi -L
เตรียมการ Import Libary
import tensorflow as tf
import PIL
from tensorflow.keras import layers
import matplotlib.pyplot as plt
import numpy as np
import pickle as p
import plotly
from tensorflow.keras.models import load_model
from tensorflow.keras.models import model_from_json
import plotly.graph_objs as go
from tensorflow import keras
from tensorflow.keras.models import Sequential
tf._version_
Config ให้ Tensorflow ใช้งาน GPU ด้วยคำสั่ง
config = tf.compat.v1.ConfigProto()
config.gpu_options.allow_growth = True
sess = tf.compat.v1.Session(config=config)print( 'Tensorflow Version:', tf.__version__)
print("GPU Available::", tf.config.list_physical_devices('GPU'))

จัดเตรียมชุดข้อมูล
ต่อมาเป็นในส่วนของการเตรียมข้อมูล จะมีขั้นตอนดังต่อไปนี้
import pathlib
dataset="C:/Users/Chin/AI/Fruit" <--path ของ dataset
data_dir = pathlib.Path(dataset)
image_count = len(list(data_dir.glob('*/*.jpg')))
print("count of image : ",image_count)
จะแสดงถึงจำนวนรูปทั้งหมดที่เราเตรียมไว้

เตรียม data set
เป็นการปรับภาพ เพราะบางภาพอาจมีขนาดไม่เท่ากัน จึงต้องปรับขนาดภาพให้มีขนาดเท่ากัน ตามโค้ดต่อไปนี้
batch_size = 16
img_height = 200
img_width = 200
Batch_size เป็นการกำหนดขนาดของแต่ละการอ่านข้อมูล
img_height ความสูงของรูปภาพแต่ละรูป
img_width ความกว้างของรูปภาพแต่ละรูป
จากนั้นแบ่งข้อมูลสำหรับ Training และ Validate
train_ds = tf.keras.preprocessing.image_dataset_from_directory(
  data_dir,
  validation_split=0.2,
  subset="training",
  seed=123,
  image_size=(img_height, img_width),
  batch_size=batch_size)val_ds = tf.keras.preprocessing.image_dataset_from_directory(
 data_dir,
 validation_split=0.2,
 subset="validation",
 seed=123,
 image_size=(img_height, img_width),
 batch_size=batch_size)
โค้ดด้านบนเป็นการแบ่งรูปภาพทั้งหมดเป็น train_ds และ val_ds
train_ds คือ Dataset ที่จะนำมา Train นั่นเอง ซึ่งจะเห็น validation_split = 0.2 หมายความว่าเราจะแบ่ง Dataset มาเพื่อ Train 80% และแบ่ง 20% ไปใช้ในการ Validate นั่นเอง
ชื่อคลาสแต่ละคลาสของ dataset ที่ชื่อ train_ds
class_name = train_ds.class_names
print(class_name)
Test data
import matplotlib.pyplot as plt
plt.figure(figsize=(8, 8))
for images, labels in train_ds.take(1):
    for i in range(6):
        ax = plt.subplot(3, 3, i + 1)
        plt.imshow(images[i].numpy().astype("uint8"))
        plt.title(class_name[labels[i]])
        plt.axis("off")
แสดงผลรูปภาพพร้อมกับชื่อของภาพที่อยู่ใน Dataset 6 รูปออกมา ดังนี้

Check Dataset
for image_batch,labels_batch in train_ds:
 print(image_batch.shape)
 print(labels_batch.shape)
 break
เป็นการTestอีกครั้ง เพื่อให้รู้ว่า Data set พร้อมใช้งานหรือไม่

ค่า Batch = 16 และขนาด 200*200 และใช้ Color Chanal 3 ช่อง(R,G,B)
Normalization Color
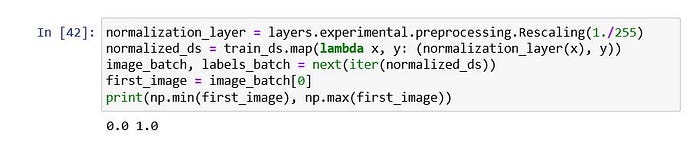
normalization_layer = layers.experimental.preprocessing.Rescaling(1./255)
normalized_ds = train_ds.map(lambda x, y: (normalization_layer(x), y))
image_batch, labels_batch = next(iter(normalized_ds))
first_image = image_batch[0]
print(np.min(first_image), np.max(first_image))
เพื่อความเหมาะสมของภาพ จะทำการทำ Normalization หรือง่ายๆคือ แปลงค่าสีจาก 255 ในแต่ละ Chanal ให้เป็นค่า 0–1
Create Model
num_classes = 4
epochs=10
model = Sequential([
 layers.experimental.preprocessing.Rescaling(1./255, input_shape=(img_height, img_width, 3)),
 layers.Conv2D(16, 3, padding='same', activation='relu'),
 layers.MaxPooling2D(),
 layers.Conv2D(32, 3, padding='same', activation='relu'),
 layers.MaxPooling2D(),
 layers.Conv2D(64, 3, padding='same', activation='relu'),
 layers.MaxPooling2D(),
 layers.Flatten(),
 layers.Dense(128, activation='relu'),
 layers.Dense(num_classes)
])model.compile(optimizer='adam',
              loss=tf.keras.losses.SparseCategoricalCrossentropy(from_logits=True),
              metrics=['accuracy'])
model.summary()
เราจะกำหนด num_class ซึ่งก็คือจำนวนคลาสที่เราจะใช้แสดง และมีค่าคือ 4 คลาสนั่นเองครับ (แอปเปิ้ล , กล้วย , สตอเบอร์รี่,ส้ม)
epochs คือ จำนวนครั้งที่เราจะ Train ครับ
และเราจะกำหนดค่าใน model เป็นวิธีที่เราจะใช้ในการจำแนกภาพต่างๆ ของเรา

Train Model
train Model เป็นหัวใจของการทำ Image Classification โดยเราจะเริ่มกำหนดค่าต่างๆ ดังนี้
his = model.fit(
 train_ds,
 validation_data=val_ds,
 epochs=epochs
)
his คือ เรียกใช้ function fit ใน model เพื่อทำการ train ครับ และใส่ parameter ที่จำเป็นเข้าไป

Save Model
ทำการ Save model และค่าต่างๆ ที่เราทำการ Train เพื่อที่เราจะเรียกใช้ค่าต่างๆได้ทันทีโดยไม่ต้องทำการ Train ใหม่ โค้ดในส่วนของการ save
with open("history_model", "wb") as file:
 p.dump(his.history, file)

filepath="model1.h5"
model.save(filepath)
filepath_model = 'model1.json'
filepath_weights = 'weights_model.h5'
model_json = model.to_json()
with open(filepath_model, "w") as json_file:
 json_file.write(model_json)

 model.save_weights('weights_model.h5')
 print("Saved model to disk")
Load
เมื่อเราทำการโหลด ก็จะใช้โค้ดดังนี้ครับ


Visualization
การเรียกใช้ผลของการ Train ให้ออกมาเป็นภาพกราฟ หรือ Visualization ได้ดังนี้
acc = his['accuracy']
val_acc = his['val_accuracy']loss=his['loss']
val_loss=his['val_loss']epochs_range = range(epochs)plt.figure(figsize=(8, 8))
plt.subplot(1, 2, 1)
plt.plot(epochs_range, acc, label='Training Accuracy')
plt.plot(epochs_range, val_acc, label='Validation Accuracy')
plt.legend(loc='lower right')
plt.title('Training and Validation Accuracy')
plt.subplot(1, 2, 2)
plt.plot(epochs_range, loss, label='Training Loss')
plt.plot(epochs_range, val_loss, label='Validation Loss')
plt.legend(loc='upper right')
plt.title('Training and Validation Loss')
plt.show()

Prediction
การทดลองพยากรณ์ หรือการจำแนกผลไม้ด้วย Model ที่เรา Train มาโดยที่เราจะใช้ภาพที่เราเตรียมไว้ดังนี้
import requests
from IPython.display import Image
from io import BytesIOtest_path = ("C:/Users/Chin/AI/Fruit/Apples/Apple29.jpg")
img = keras.preprocessing.image.load_img(
 test_path, target_size=(img_height, img_width)
)
img_array = keras.preprocessing.image.img_to_array(img)
img_array = tf.expand_dims(img_array, 0)
predictions = predict_model.predict(img_array)
score = tf.nn.softmax(predictions[0])
print("แอปเปิ้ล",score[0],"กล้วย",score[1],"สตอเบอรี่",score[2],"ส้ม",score[3])
display(Image(filename=test_path,width=150, height=150))
if score[0]==np.max(score) :
 fruit = "แอปเปิ้ล"
elif score[1]==np.max(score) :
 fruit = "กล้วย"
elif score[2]==np.max(score) :
 fruit = "สตอเบอรี่"
elif score[3]==np.max(score) :
 fruit = "ส้ม"
print(
 "มีความมั่นใจว่าจะเป็น {} {:.2f}%."
 .format(fruit, 100 * np.max(score))
)

นี่คือการทำ image Classification จากการจำแนกภาพผลไม้
ขอจบการนำเสนอเพียงเท่านี้ ขอบคุณครับ
